Let's Open VSCODE or android studio
first create project through Command prompt
- winkey + R and type cmd then Enter
- open a command prompt then after type flutter create project_name
Now main.dart Code Here
import 'package:flutter/material.dart';
import 'Pages/camera.dart';
import 'Pages/calls.dart';
import 'Pages/chats.dart';
import 'Pages/status.dart';
void main() {
runApp(MyApp());
}
class MyApp extends StatefulWidget {
@override
_MyAppState createState() => _MyAppState();
}
class _MyAppState extends State<MyApp> {
@override
Widget build(BuildContext context) {
return MaterialApp(
debugShowCheckedModeBanner: false,
home: Home(),
);
}
}
class Home extends StatefulWidget {
@override
_HomeState createState() => _HomeState();
}
class _HomeState extends State<Home>
with SingleTickerProviderStateMixin {
TabController _tabController;
@override
void initState() {
super.initState();
_tabController =
new TabController(length: 4, vsync: this, initialIndex: 1);
}
@override
Widget build(BuildContext context) {
return Scaffold(
appBar: AppBar(
title: Text("Whatsapp"),
elevation: 0.7,
backgroundColor: Color(0xff075E54),
actions: <Widget>[
IconButton(
icon: Icon(Icons.search),
onPressed: () {},
),
IconButton(
icon: Icon(Icons.more_vert),
onPressed: () {},
)
],
bottom: new TabBar(
controller: _tabController,
indicatorColor: Colors.white,
tabs: <Widget>[
Tab(
icon: Icon(Icons.camera_alt),
),
Tab(
text: "Chat",
),
Tab(
text: 'Status',
),
Tab(
text: 'Calls',
)
],
),
),
body: TabBarView(controller: _tabController,
children: <Widget>[
new CameraScreen(),//Pages
new ChatsScreen(),//Pages
new StatusScreen(),//Pages
new CallsScreen()//Pages
]),
);
}
}
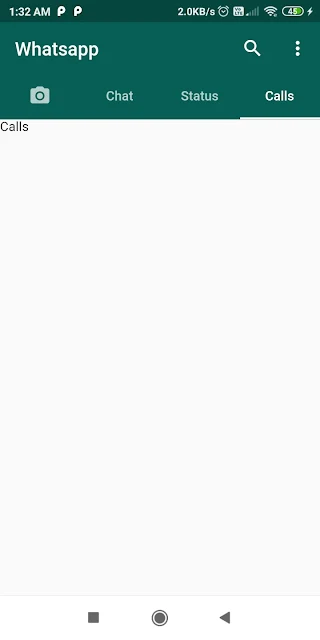
after that result
Demo Video Available:-
Pages Coding As Soon As possible


.png)

3 Comments
Very informative and detailed description. Great work.
ReplyDeleteThank you ☺
DeleteWww.umktricks.com
ReplyDeletethanks for your suggestion and improving quality of the content